Flagging exceptions allows you to limit your view to only relevant and specific data. Flagging is available in the following modules:
- Provider Exceptions
- Retailer Exceptions
- Pre-Live Monitoring
Things that you will be able to do with this feature include:
- The ability to assign a flag reason when changing a flag status
- The ability to filter by various status flags.
- Admin users will be able to modify, add, and delete flag reasons.
- 'Needs Review' flag status, which will alert support that an exception needs additional review.
How to use Flags
When entering the exceptions module you will see a small icon with a flag in it near the top of the page.

Once you have selected a few titles you will be able to click on the flag icon and select a flag you would like associated with the exception.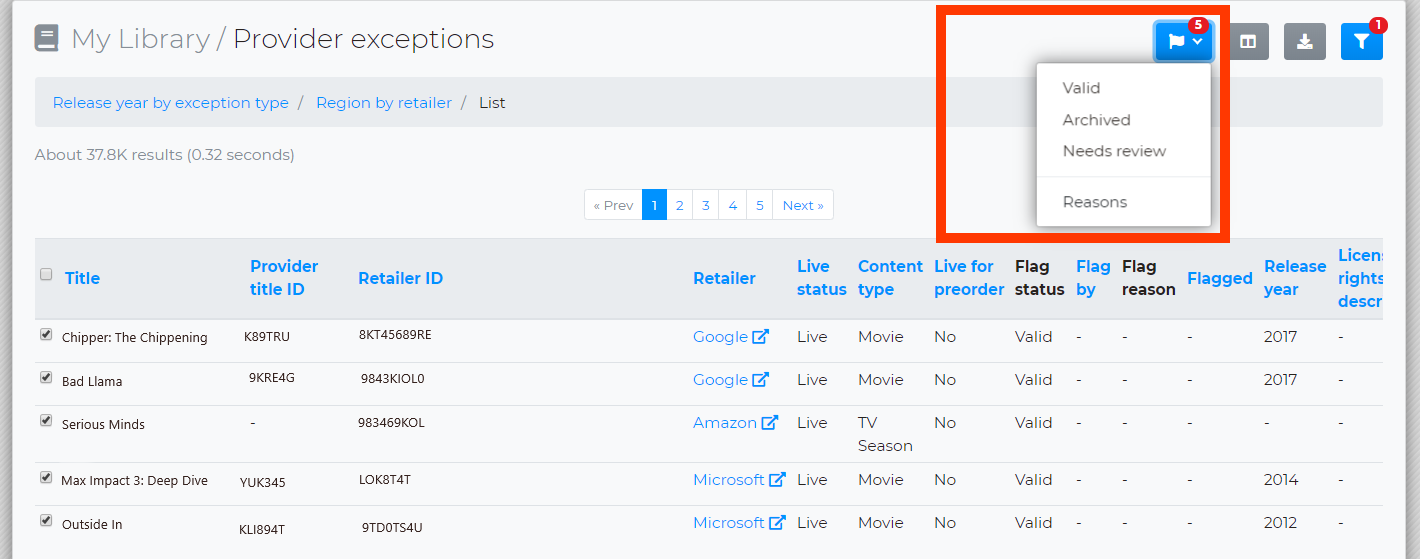
For this example we will be looking at the flag 'Needs Review'. You would use this flag if the exception appears incorrect and you would like to have it reviewed by support.
Once you click on 'Needs Review' you will see a confirmation page where it will ask you to verify the results. Press 'Ok' to proceed.

Once the selections are confirmed you will see the exceptions table again. You will notice that under 'Flag Status' our selections now all say 'Needs Review'. 'Flag By' will show your email and 'Flagged' will show the date.
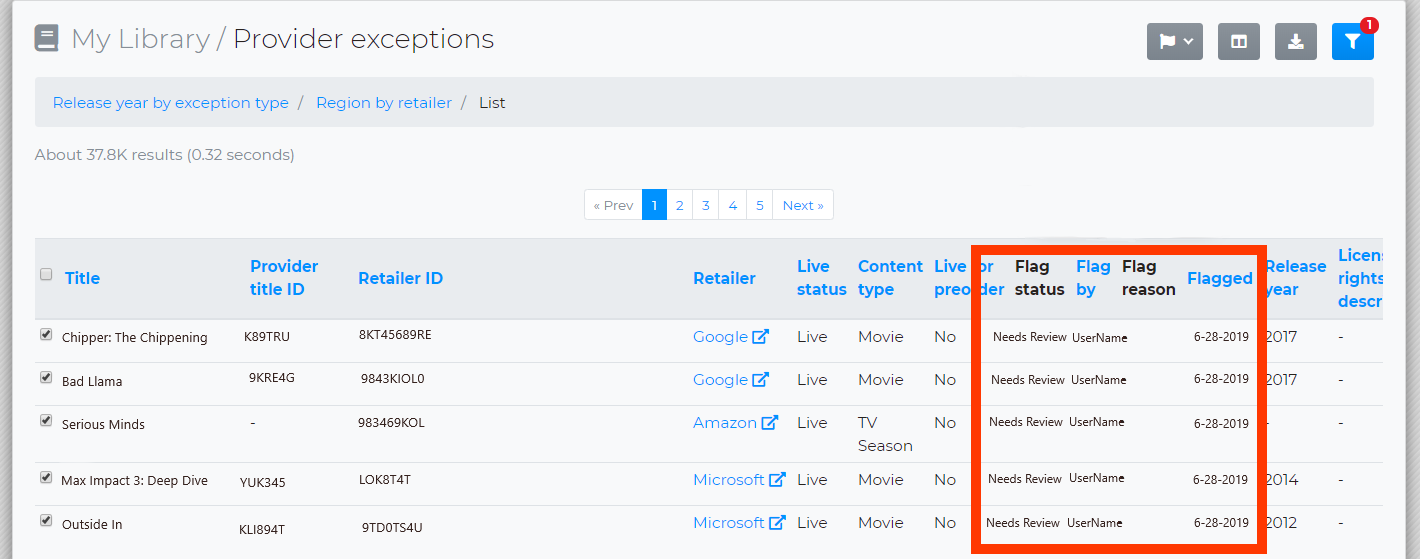
Another column you will notice here is 'Flag Reason'. This feature allows you to associate reasons with your flags. This allows for easy flag sorting among flags of the same type.
You will also see in our highlighted section above the 'Flag by' column. Here you can see the username of the user that initially flagged the exception.
This indicates the time when the exception was flagged. In the UI time is displayed as follows (Example: 2 hours ago, A month ago) wherein the export report it will be in ISO time i.e; YYYY-MM-DDTHH:MM:SS+00:00
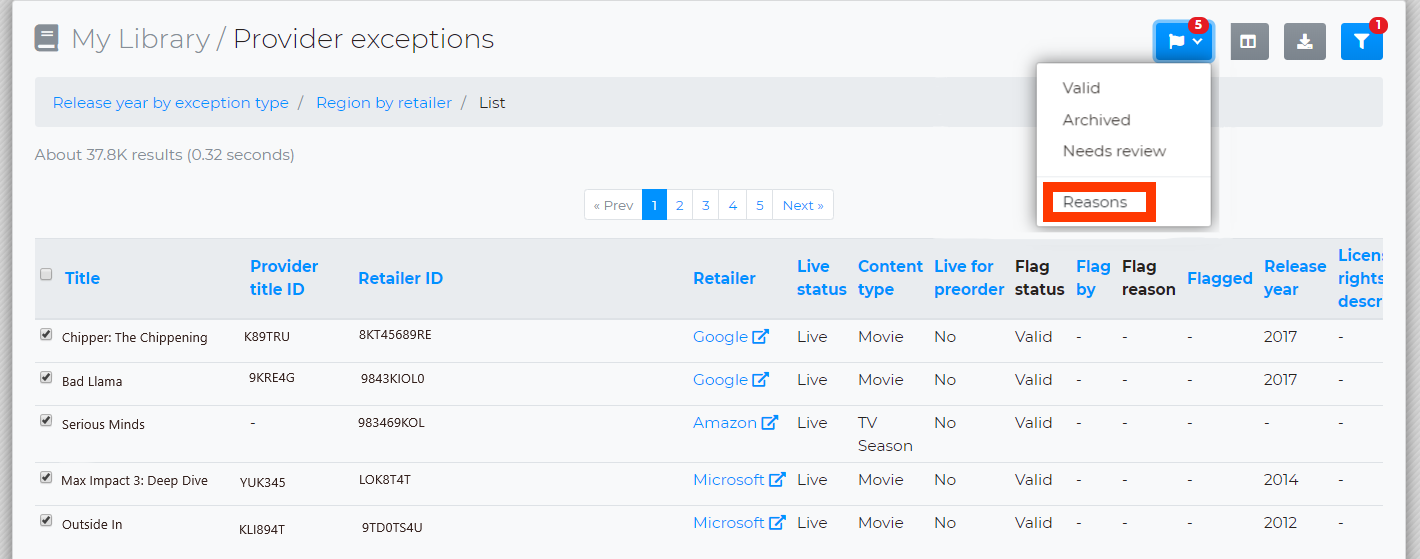
You can view and modify your reasons by selecting the flag icon again and clicking 'Reasons'.
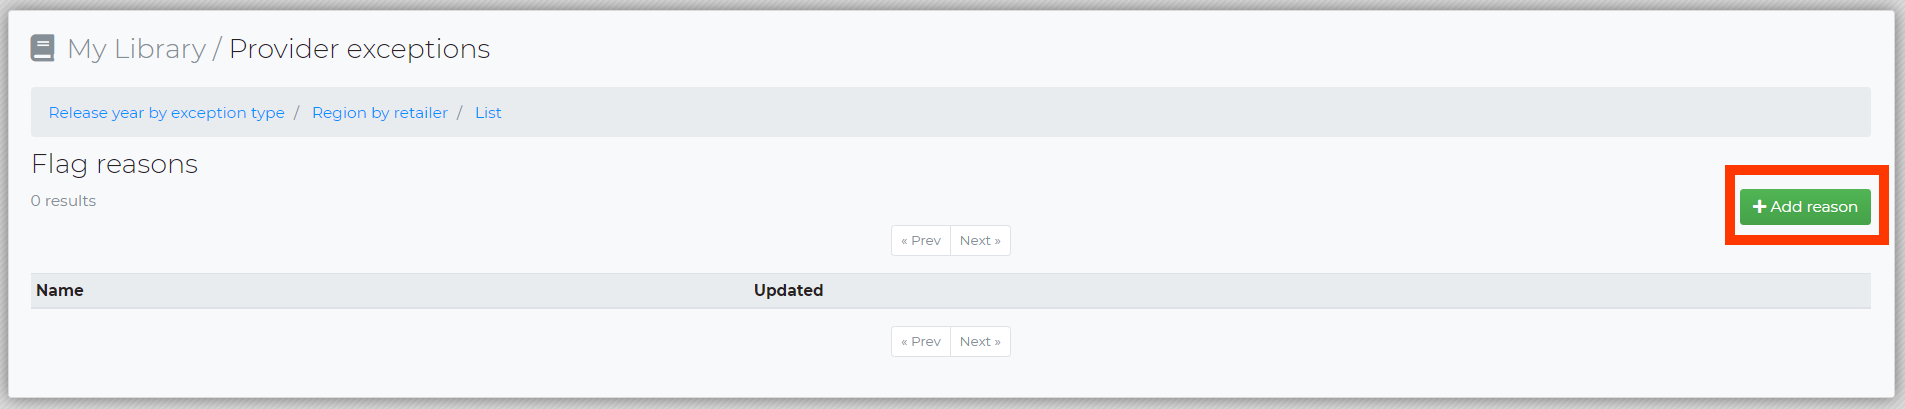
Once you click on 'Reasons' you will see a page that displays all of your current reasons and gives you the ability to add or modify existing reasons. You can select 'Add Reason' to create new reasons and the ellipsis on the right to modify or delete existing reasons.
Administrators in your organization can determine which users have access to the 'Needs Review' flag. by default, not every user will have this feature available.