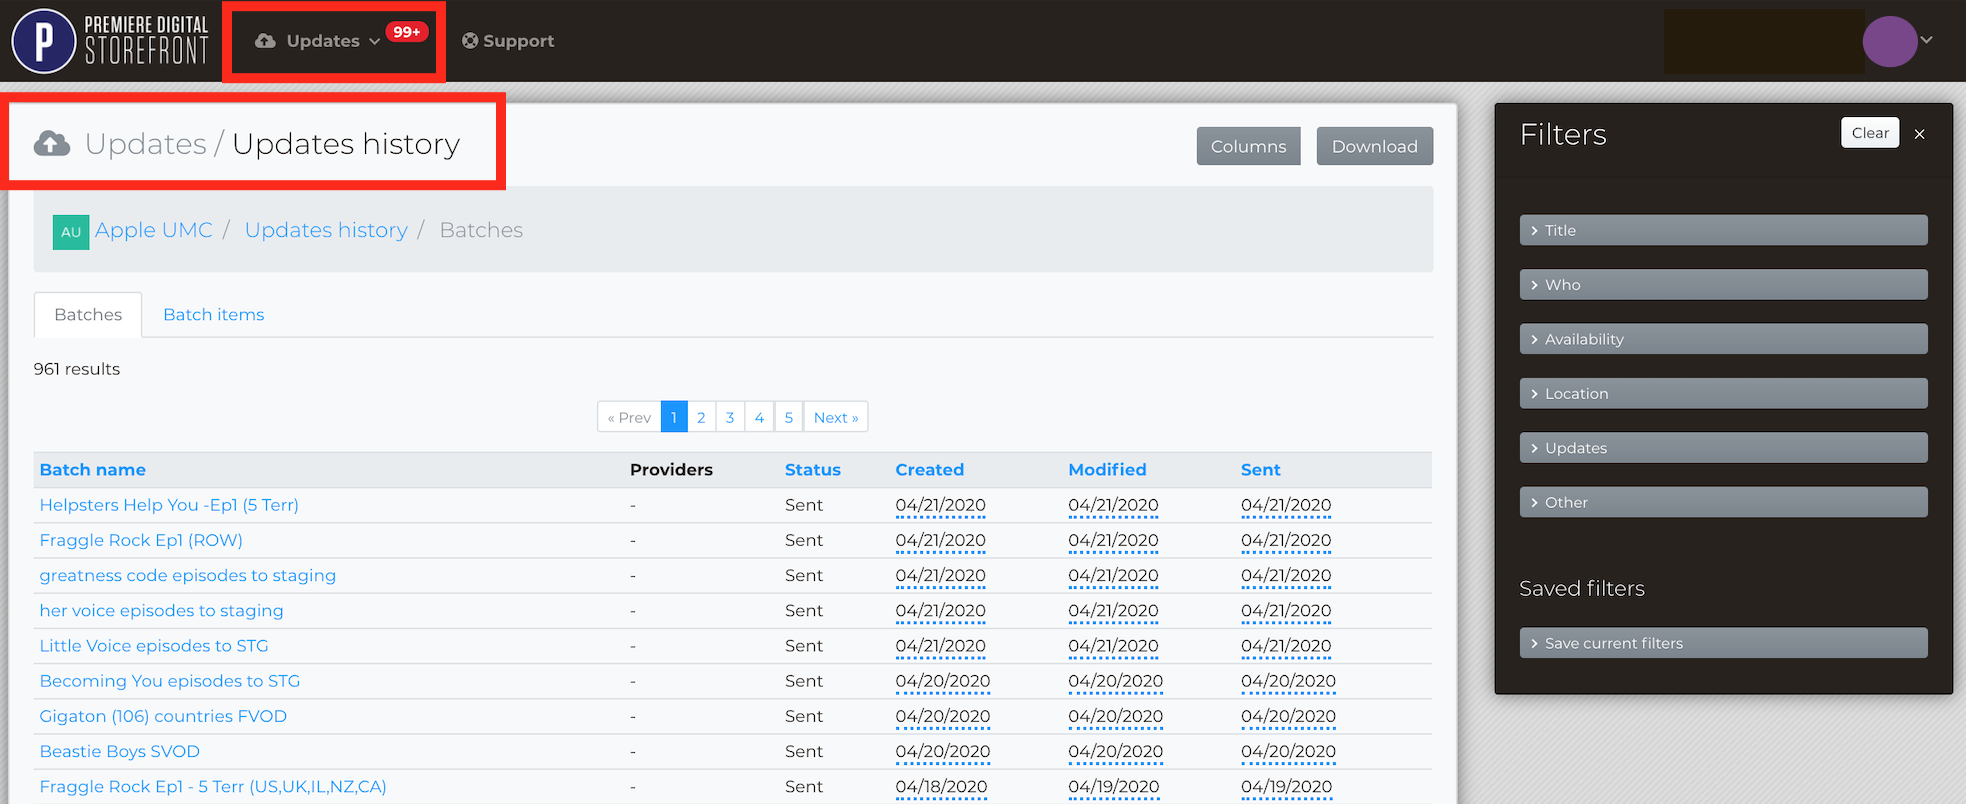
All updates made on the create updates page will be shown in the Updates History view.
Types of updates viewed in History:
On the Create Updates module, every sent batch or saved draft will receive a unique name if one is not already entered by the user.

Send Batch
Once start and end dates are entered for specific offers and retailers, updates are pushed through by selecting Send Batch.
Save Draft
The option to save a draft of updates can be done by selecting Save Draft. Save draft is extremely helpful to a user's workflow if any previously entered dates need to be revisited before sending the batch. The saved batch can conveniently be reviewed in Updates History.
Updates History:
Uniquely named drafts and batches will show in two tabs:
Note: Each view can be filtered using the filter drawer to the right of the page.
1. Batches-This tab shows each uniquely named batch. These are titles, retailers, shows, series, and episodes rolled into one uniquely named saved draft or sent batch. Each draft or batch can be as large or small as needed.
When selecting a name for batches or drafts, the Batch Item View will be triggered and presented.
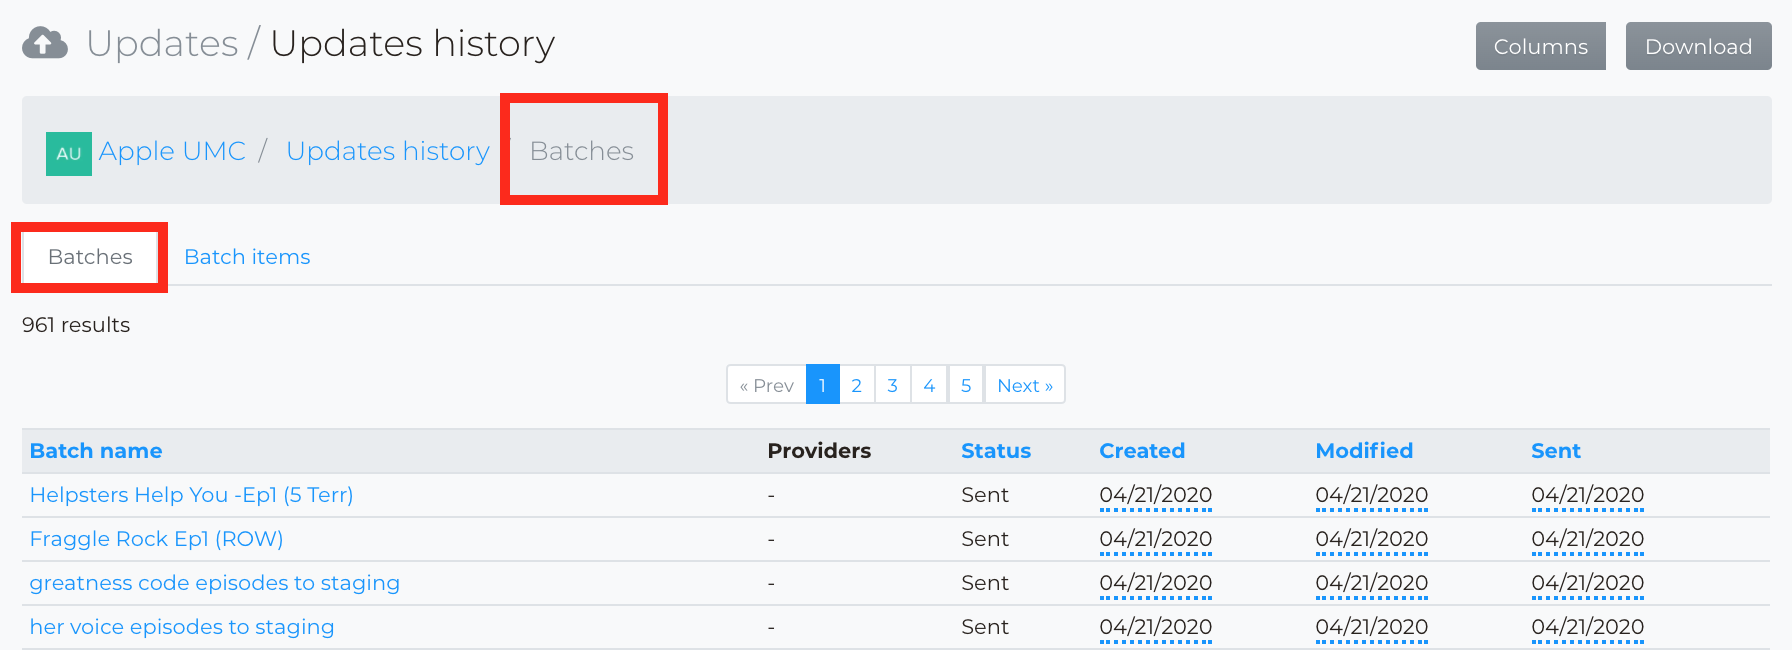
2. Batch Items-This tab shows a list view of each updated title or episode within a batch.
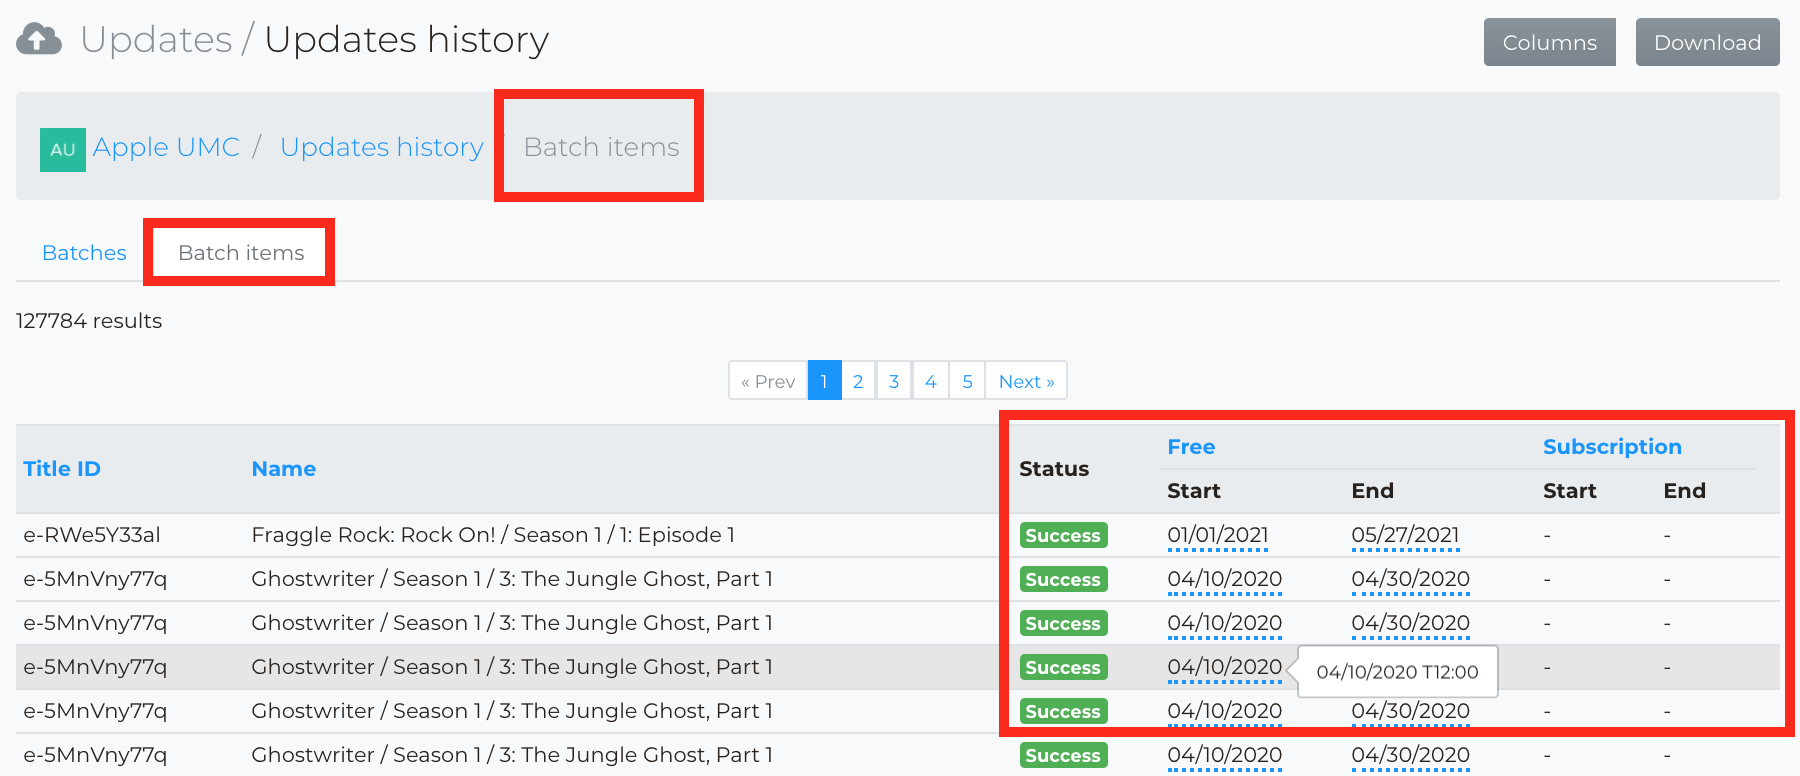
This is where users can adjust the start and end dates to saved drafts. However, users can't make any changes to batches that have already been sent, they can only view the details around it. This is a great place to double-check that sent items are successfully pushed through and correct. Success can be confirmed by reviewing the status and start and end date columns shown below:
Alerts:
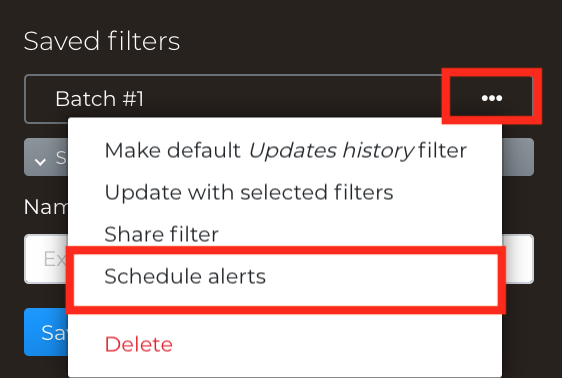
Alerts can be scheduled to saved filters only in the Updates History page. These alerts will notify users when filtered titles have been updated.
Users can schedule alerts by:
1. Creating a filter and clicking "Save".
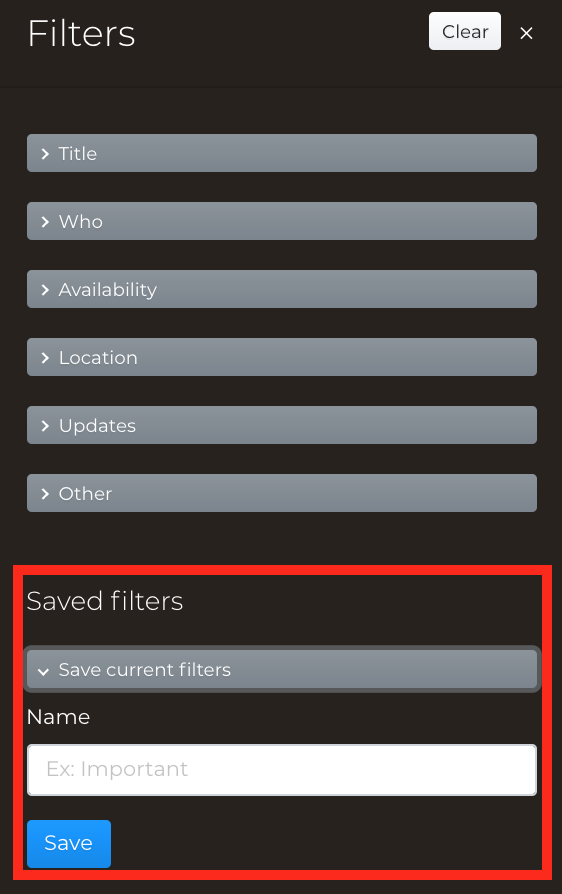
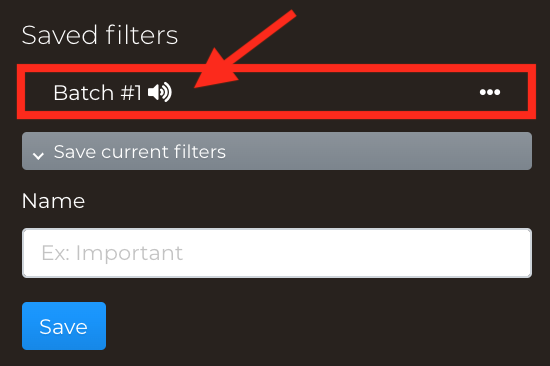
2. Select the ellipsis to the right of the filter name and click "Schedule alerts".
3. Once "Schedule filters" has been selected, a little speaker will appear next to the filter name. This is confirmation that the alert has been successfully scheduled.
For more information on scheduling alerts click here.
For more information on creating filters click here.