Overview
Exception Reports are customized reports that are sent directly to a user's inbox and highlight the most important exceptions to review. These reports compare the most recent EMA against current avails to identify changes based on automated audits. Users can create, schedule, edit, generate, and delete report rules to customize the reports they receive.
Accessing Exception Reports
To access Exception Reports, navigate to the Exceptions module from the Reports page.
The Exception Reports page displays all current reports for your organization. To create or manage report rules, select Manage Rules in the upper-right corner.
Creating a Rule
- Select Manage Rules.
- Select Add Rule.
A new window will open where you can customize your Exception Report.
Rule Fields
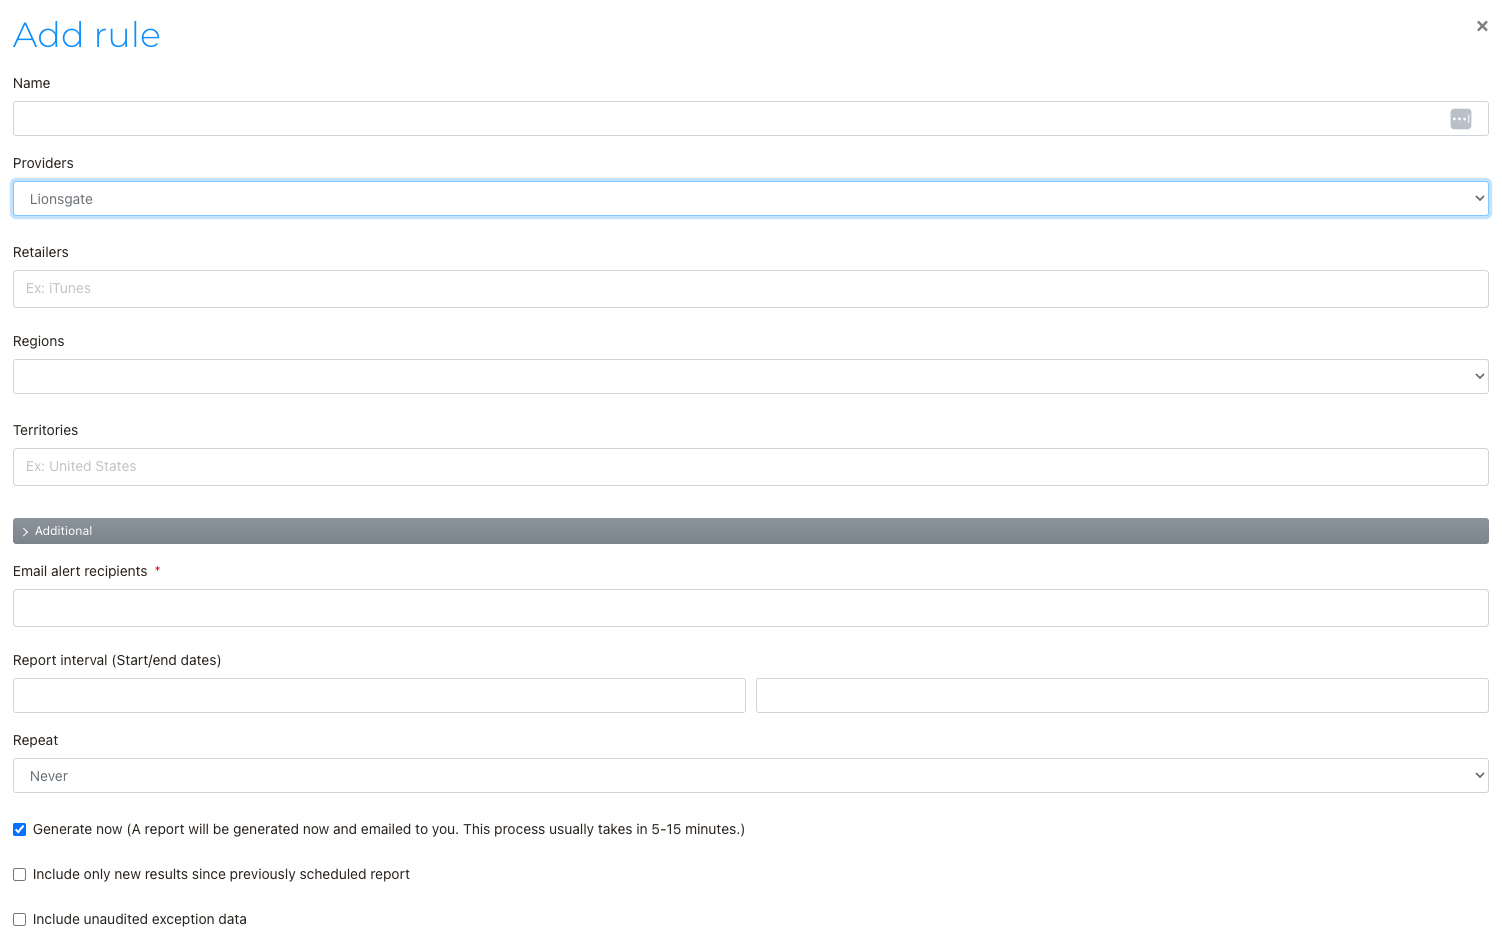
Name
Enter a descriptive name for the rule that clearly identifies its purpose (for example, [Platform] Daily Exceptions for [Territory]).
Provider
This field is automatically populated with your organization's provider.
Retailer
Select one or more retailers, or leave the field blank to include all subscribed retailers. Exception Reports will only generate for retailers your organization is subscribed to and delivers EMA Avails to Storefront.
Regions & Territories
Select specific regions or territories, or leave the field blank to include all regions and territories. If both are selected, regions take precedence over territories.
Additional
Further customize the report by selecting Sales Types, Formats, or searching for specific titles by name or ID. If no additional filters are selected, all offer types and formats are included.
Email Alert Recipients
Add one or more Storefront users within your organization to receive the report via email.
Scheduling Alerts
Report Interval
Specify a start and end date for the report. Reports can also be scheduled to begin on a future date.
Repeat
Configure how often the report is generated (Never, Daily, Weekly, or Monthly). Make sure the report interval aligns with the selected cadence. For example, if the report interval only lasts one week, a weekly report will only generate once.
Additional Options
- Generate the report immediately.
- Include only new results since the previous scheduled report.
- Include only unaudited exception data.
After configuring the rule, select Save.
Managing Existing Rules
After creating a rule, you can edit, generate, view, or delete it at any time.
Editing a Rule
Select the rule name to modify existing filters, recipients, scheduling options, or the rule name itself. After making your changes, select Save.
Managing Rules from the Context Menu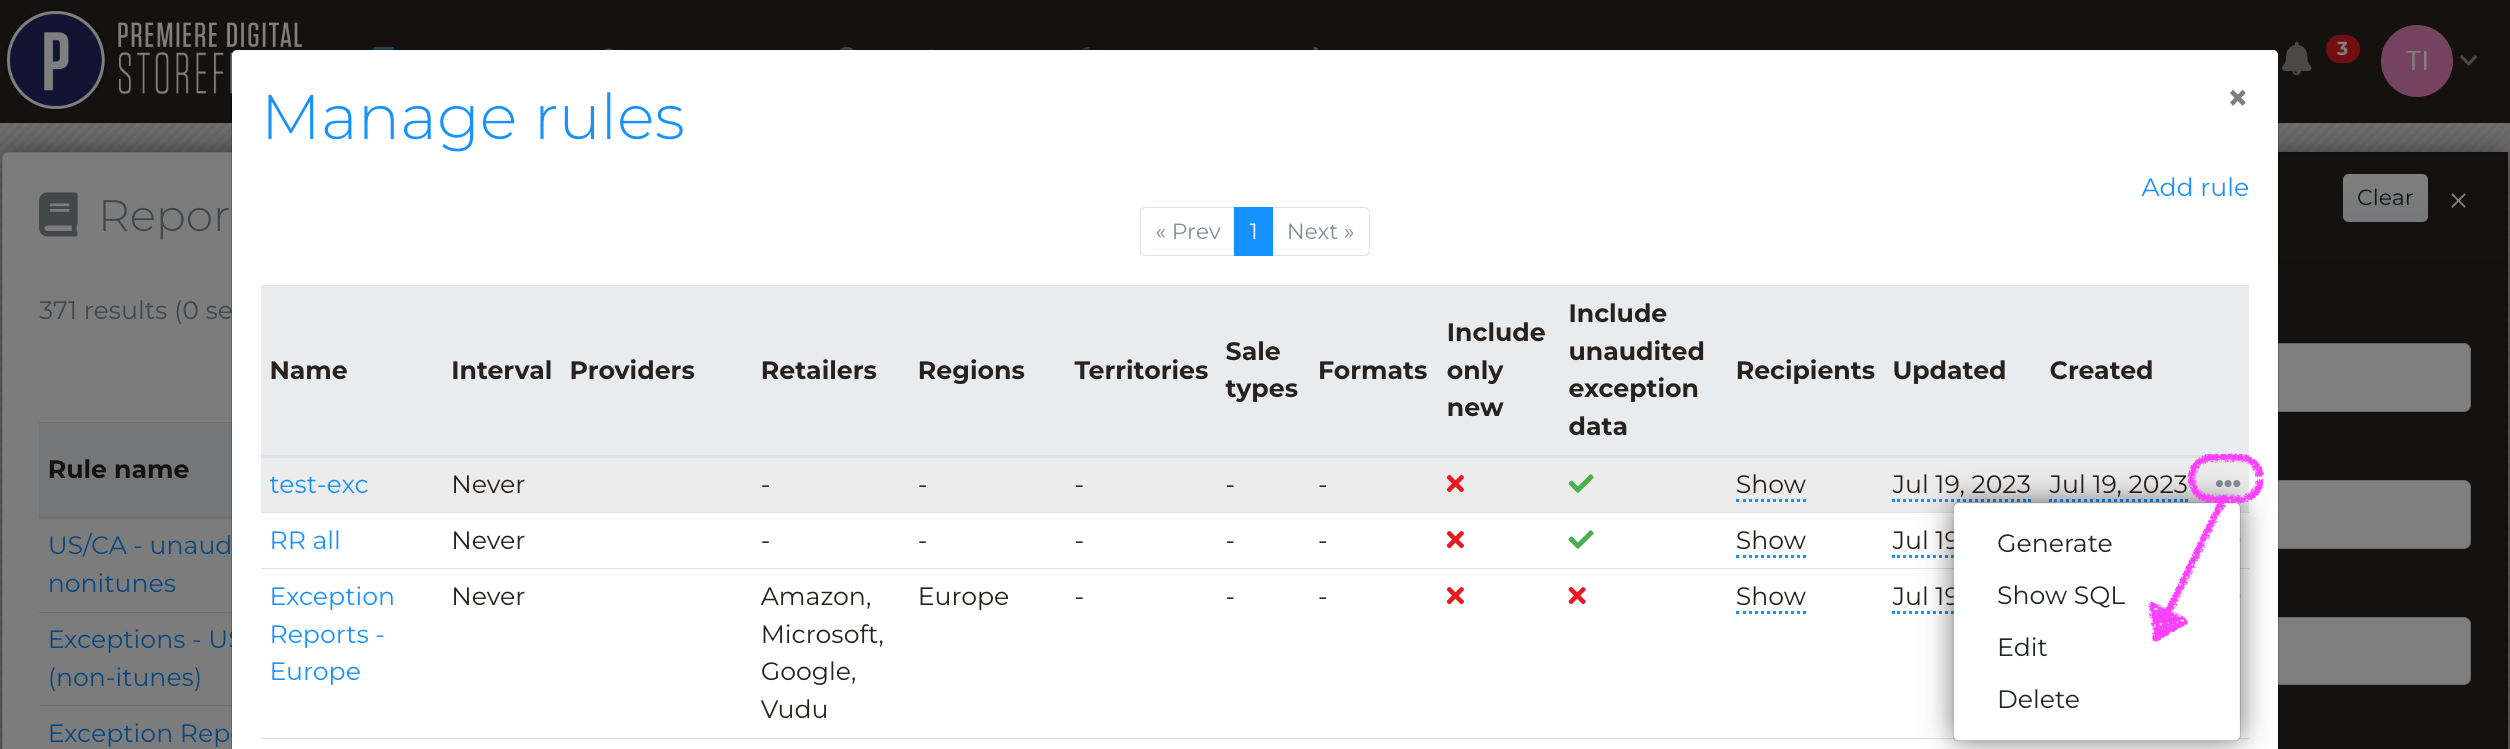
You can also manage rules from the ⋯ (ellipsis) menu on the Manage Rules page.
The context menu allows you to:
- Generate a one-time report.
- View the query used to create the rule.
- Edit the rule.
- Delete the rule.